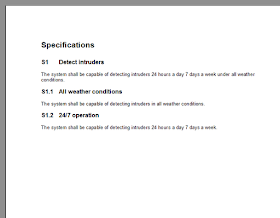
This SysML (1.2) Requirements Model contains three requirements in a package called "Specifications". "Detect intruders" is broken down into two more specific requirements: "All weather conditions" and "24/7 operation".
In SysML, a requirement is an id / text pair where the id is usually a structured key indicating the source of the requirement (ex, "SYSX" for System X) and a hierarchy (1.1 belongs to 1). "text" is the description of the requirement and is not limited in length. id and text are represented as attributes in a compartment "tags".
 |
| A SysML Requirements Diagram |
"All weather conditions" and "24/7 operation" are represented as child objects of the "Detect intruders" requirement. The hierarchy is enforced manually through id assignment and in the Project Browser by dragging one requirement over another.
 |
| Nested Requirements Elements |
You can distribute this model by generating an RTF or PDF. Right mouse click on a package, select Documentation, select Rich Text Format (RTF) Report to bring up the Generate Documentation dialog. Alternatively, select a package and press F8.
 |
| Dialog for Document Generation and Template Management |
Out-of-the-box, EA will select the "(basic template)" template. This will result in an RTF file like the following.
 |
| RTF Document Generated with (basic template) |
Templates
To create your own template, go to Settings > Document Template Designer. A window like the following will appear. Press "New" and give the template a name.
 |
| Document Template Designer |
 |
| Document Looping Structure |
"Child elements" is important because of the nested requirements that I set up in the Project Browser.
Insert Field
EA represents the SysML attributes as tagged values and there are two ways to output them. One way is to explicitly print out all the tagged values. The other is to use the Insert Field > valueOf construct to intersperse the tagged values with other element attributes such as "Name". The following screenshot shows the Insert Field menu -- displayed by right-clicking in the appropriate section -- which is used to put in the Name and valueOf references.
 |
| Document With Fields |
 |
| Custom-built SysML Requirements Document Template |
No comments:
Post a Comment